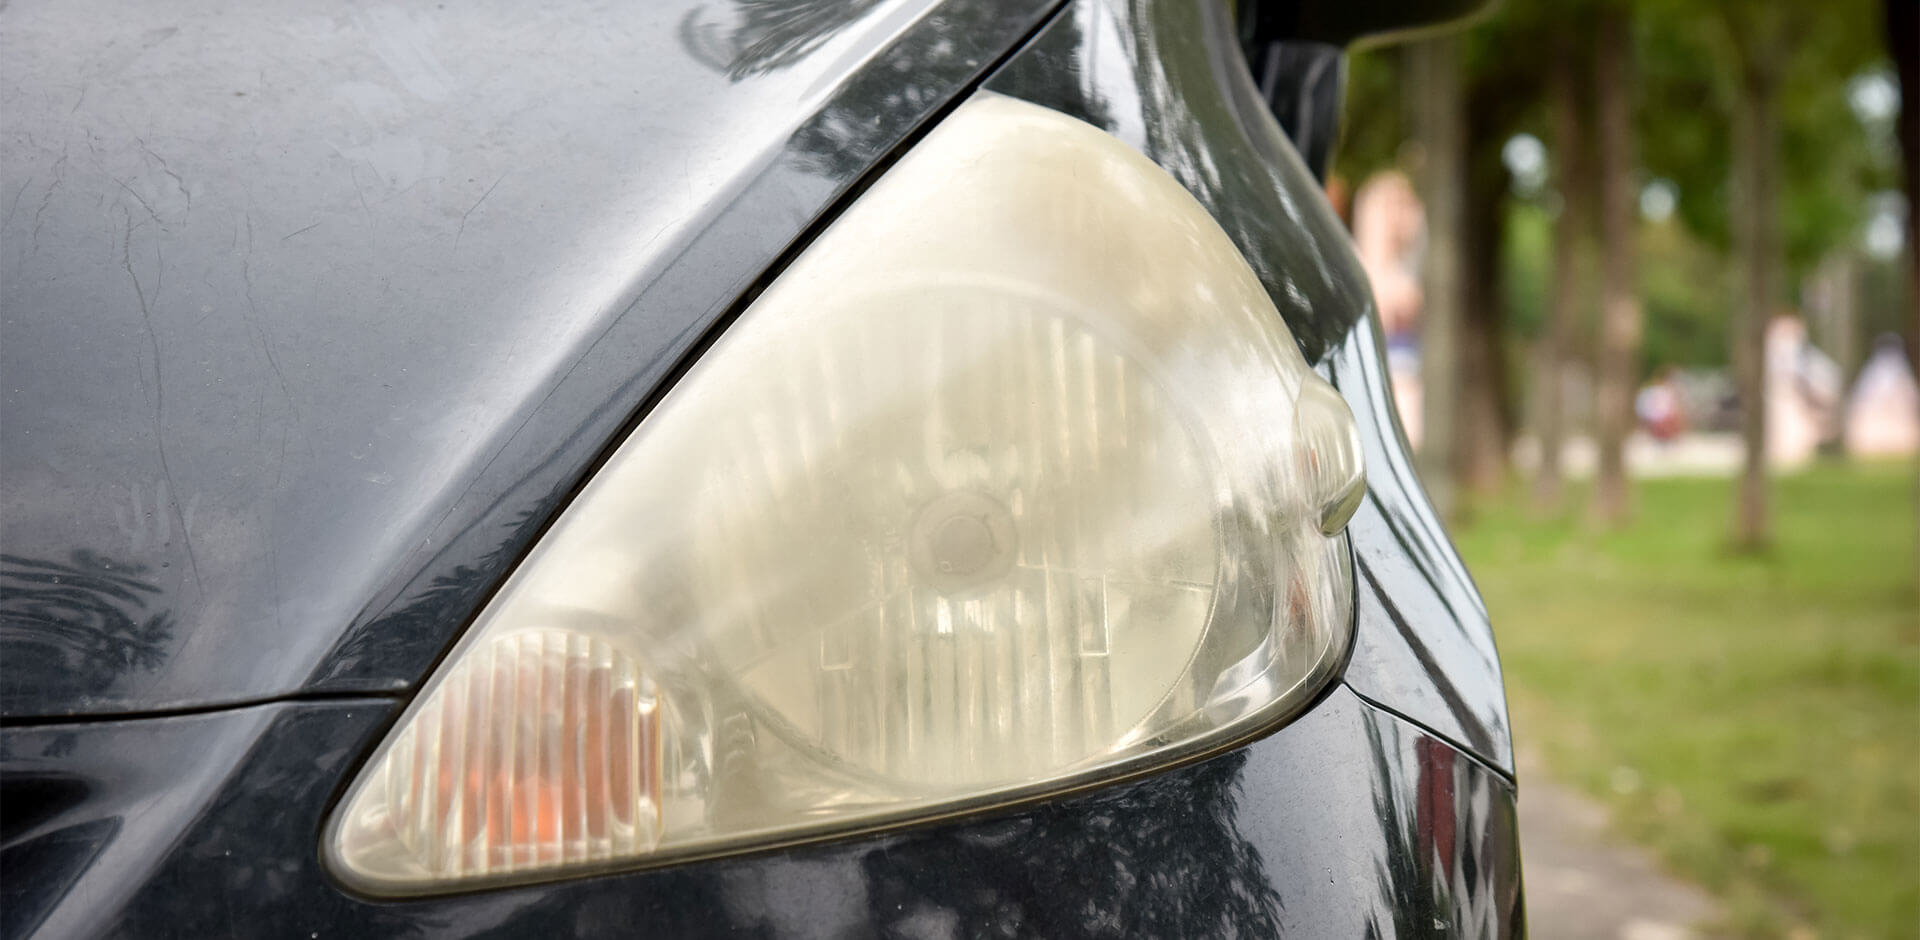
You’re heading out after sunset and suddenly notice your headlights look dimmer than usual, or maybe they just look plain cloudy in the daylight. You’re not imagining it. Foggy or yellow headlights are a common issue for car owners, especially in Florida’s hot, sunny climate. The good news? There are ways to fix it.
From DIY tricks using toothpaste or vinegar to full-on headlight restoration kits, you’ve probably seen dozens of tips online. But not all methods are created equal, and some could even make things worse. Before you grab the nearest scrubber, let’s talk about why your headlights get foggy in the first place, and what actually works to clean them.
Your headlights may look like glass, but most are made from polycarbonate plastic. Over time, that plastic takes a beating from the sun, weather, and road debris, and the clear coating designed to protect it starts to break down.
Here’s what causes that cloudy or yellow look:
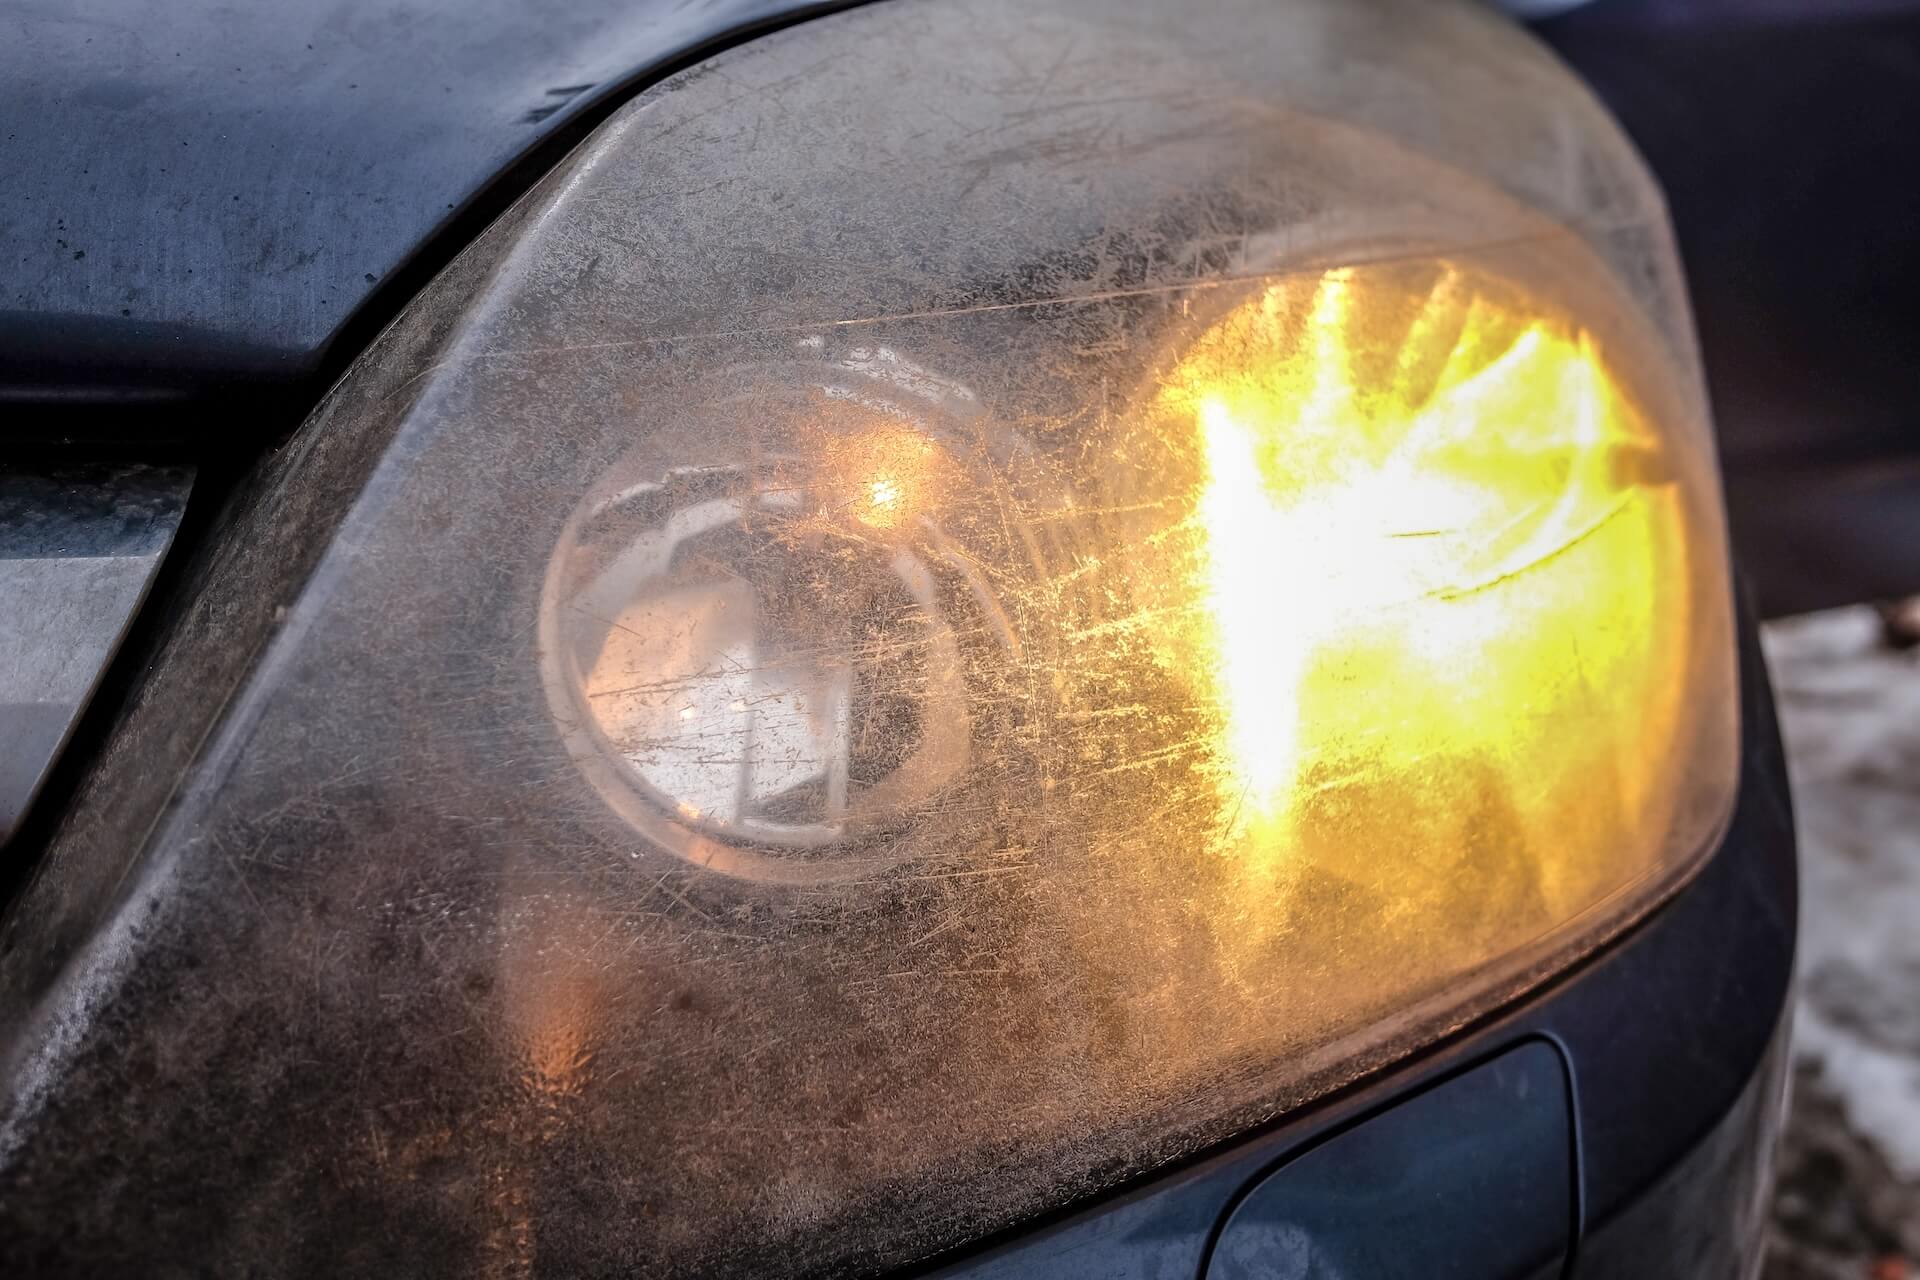
Did You Know?: Foggy headlights can reduce nighttime visibility by up to 80%, making it a safety issue, not just a cosmetic one.
If you’ve noticed your headlights aren’t as bright, or they look worn, no matter how often you clean them, you’re likely dealing with oxidation and wear on the plastic, not just dirt. That’s why regular soap and water won’t cut it.
Search online and you’ll find no shortage of creative ways to clean foggy headlights using items from your kitchen or garage. While these methods can make your headlights look a little better, most of them are quick fixes that don’t last. Let’s take a look at some of the most common DIY tricks and how effective they really are.
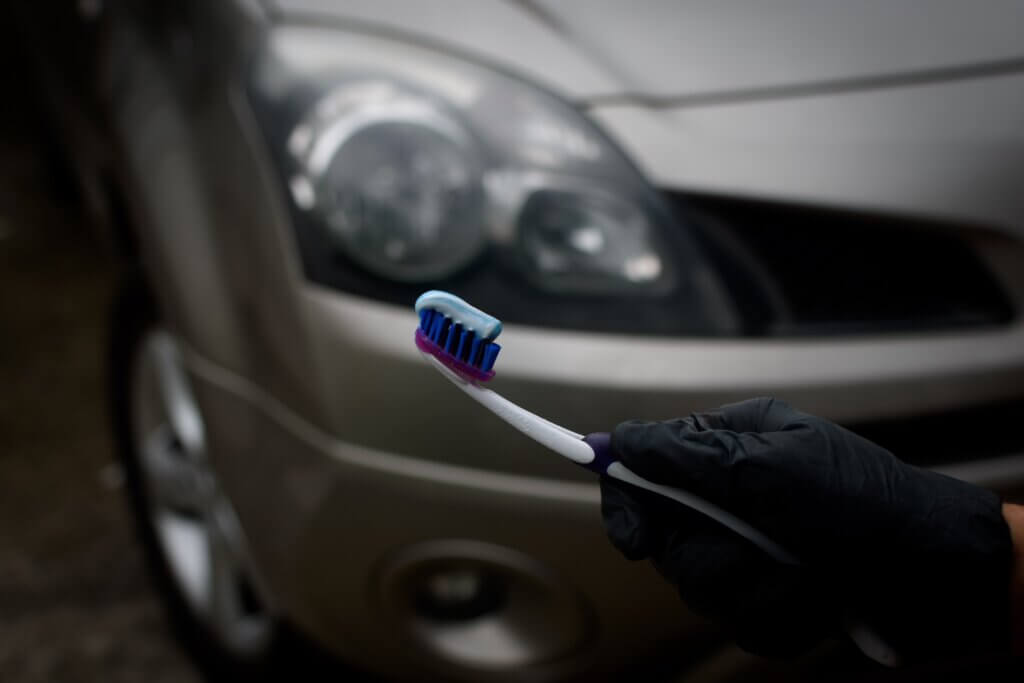
How it’s used: Squeeze a small amount of plain white toothpaste (no gels or whiteners) onto a soft cloth or sponge. Rub it into the headlight using small, circular motions, then rinse and wipe clean.
Does it work? Toothpaste contains mild abrasives that can help polish away surface-level haze and fill in micro-scratches. It gives a short-term improvement in clarity and can make headlights appear less cloudy.
Watch out for: Whitening toothpastes and those with added granules can be too abrasive and may scratch the plastic.
Verdict: If you’re going to try one method at home, this is the safest and most effective short-term option.
How it’s used: Mix baking soda and white vinegar into a paste, then apply it to the headlight with a cloth or toothbrush. Scrub in circles, let it sit for a minute, then rinse thoroughly.
Does it work? The bubbling action helps lift grime and dirt from the surface, making headlights look cleaner. It can help with surface-level dullness but won’t do much against oxidation.
Watch out for: Be careful not to let the mixture drip onto your car’s paint, as it can be slightly corrosive if left sitting too long.
Verdict: This is a gentle option for cleaning dirt or bug buildup, but don’t expect major restoration.
How it’s used: Spray a light mist of WD-40 directly onto the headlight, then wipe with a clean, dry cloth until it looks shiny.
Does it work? It adds temporary shine by masking the haze with a layer of oil. The clarity boost fades quickly and doesn’t actually clean or restore anything.
Watch out for: WD-40 leaves a slick residue that can attract more dust and grime. It’s also not designed for plastics long-term.
Verdict: Good for a quick photo or in a pinch, but not a real solution.
How it’s used: Pour Coke over the headlight or soak a cloth in it and rub it on the lens. Let it sit briefly, then scrub and rinse well.
Does it work? The phosphoric acid in Coke can help break down some grime, but it’s not strong enough to fix foggy or oxidized lenses.
Watch out for: Coke is sticky. If not rinsed thoroughly, it can leave behind residue that attracts dirt or bugs.
Verdict: More mess than it’s worth. There are better options—even among DIY methods.
Most DIY headlight restoration methods only treat the surface of the lens. They might buff out a bit of haze or grime, but they don’t reverse oxidation or provide long-lasting protection. That’s why the cloudiness usually returns, sometimes within days.
If you’re on a tight budget, it’s okay to try a safe, mild method just to get by. But for long-term clarity (and better nighttime visibility), a proper headlight restoration is worth it. You’ll get deeper results and a protective finish that keeps your lights clear longer.
Yes, but it takes time, patience, and the right tools. DIY headlight restoration kits are widely available and often include everything you need:
These kits can absolutely work if you follow every step carefully, but that’s where most DIY efforts fall short. It’s easy to get impatient, skip a step, or apply too much pressure and accidentally scratch the headlight (or worse, the paint around it). The kits come with supplies, not experience.
If you’re up for the challenge and willing to stick it out, it can be a cost-effective solution. Just be ready for a bit of elbow grease.
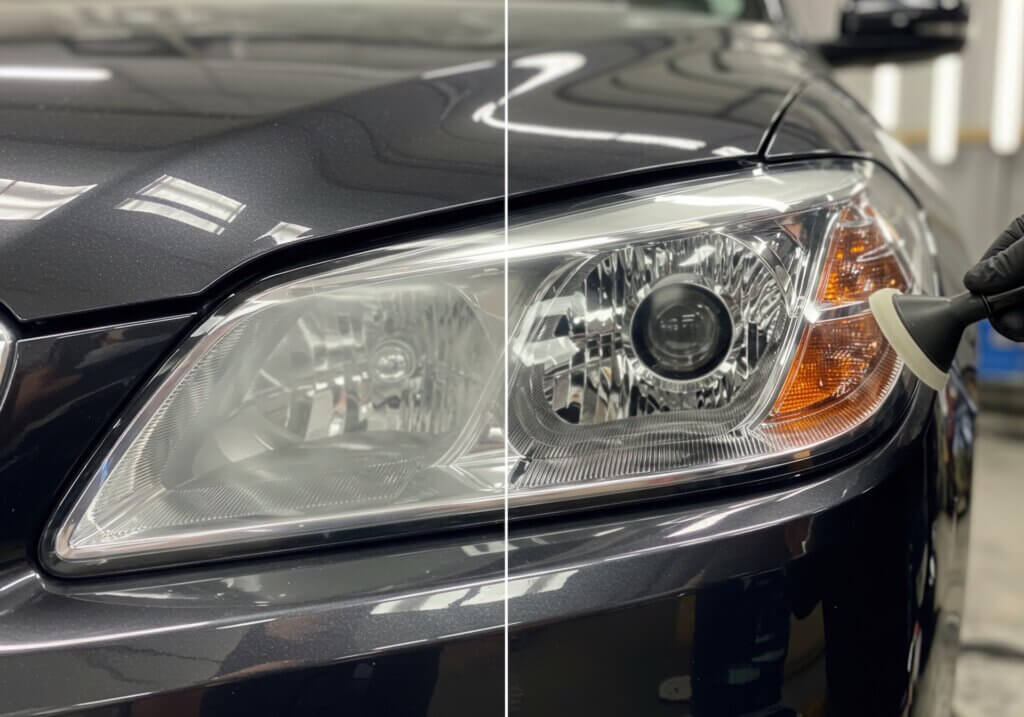
Sometimes it’s just easier and more effective to let a pro handle it. Proper restoration takes time and technique, and if you’re not confident in your skills, it’s easy to spend money on supplies only to give up halfway through.
Professional detailing includes:
If you’d rather skip the mess and get it done right, Grease Pro offers professional headlight restoration with select car detailing packages at our Car Wash & Detailing location in Panama City. It’s a hassle-free way to get crystal-clear headlights without the guesswork.
Foggy headlights aren’t just annoying. They can make night driving more dangerous and even hurt your car’s resale value. While DIY methods may give you a quick boost in clarity, long-lasting results require more than just toothpaste or a quick polish.
For a safe, reliable, and lasting fix, proper restoration and UV protection are key.
Want a foolproof solution? Ask about professional headlight restoration during your next car wash or detailing visit at Grease Pro. It’s an easy add-on that saves you time, hassle, and keeps your headlights shining like new.
With 12 locations, there's always one close by to service all of your automobile-related needs.
BROWSE ALL LOCATIONS +