How to Check Your Car’s Oil (Without Guessing)

Checking your oil is one of the easiest ways to protect your engine and prevent expensive repairs. The good news is that it only takes a few minutes and doesn’t require special tools.

In this guide, you’ll learn how to check oil correctly, how to read the dipstick, what your oil level should look like, and what to do if it’s low. Most drivers can complete a quick oil check in 3-5 minutes.

Before You Start, Make This Quick Prep

Before you check your oil level, take a moment to set things up properly. A few small details can make a big difference in getting an accurate reading.

  • Park your vehicle on level ground
  • Turn the engine off
  • Wait a few minutes so the oil can drain back into the oil pan
  • Grab a paper towel or rag

Quick tip: If you just finished driving, waiting 5–10 minutes helps the oil settle for a more accurate dipstick reading. Some manufacturers allow checking when the engine is cold as well.

How to Check Oil With a Dipstick (Step by Step)

Most vehicles still use a dipstick to measure oil level. The process is simple once you know what to look for.

1. Locate the dipstick
Open the hood and look for the dipstick handle, usually yellow or orange.

2. Pull it out and wipe it clean
Remove the dipstick and wipe off the oil with a paper towel.

3. Insert the dipstick fully
Push it all the way back into the tube so it seats completely.

4. Pull it out again and read the level
This time, check where the oil sits on the dipstick.

5. Make sure the oil is between the marks
Your oil should fall somewhere between the minimum and maximum marks.

Mistake to avoid: Some people read the smear of oil along the metal. Instead, look for the solid oil line where the level clearly stops.

How to Read the Dipstick Marks

Dipsticks usually have markings that show the safe oil range. These may appear as MIN/MAX labels, dots, cross-hatched sections, or lines.

The key things to know:

  • Oil should sit between the minimum and maximum marks
  • Being within the safe zone matters more than being exactly at the top
  • Sometimes both sides of the dipstick look different — use the side with the clearest oil line

If the oil level is below the minimum mark, it’s time to add oil soon.

What If There’s No Dipstick?

Some newer vehicles no longer include a traditional dipstick. Instead, they measure oil level electronically through the vehicle’s onboard system.

To check oil without a dipstick:

  • Navigate to the vehicle information or maintenance menu
  • Select oil level measurement
  • Follow the prompts (some vehicles require level ground and a certain engine temperature)

Your owner’s manual will show the exact steps for your model.

What Your Oil Can Tell You (Color and Smell, Quickly)

When you check your engine oil, it’s also a good opportunity to look at its condition.

Normal oil typically appears:

  • Amber or light brown when fresh
  • Darker brown as it ages

Signs something might be wrong include:

  • Gritty texture when rubbed between fingers
  • Burnt smell coming from the dipstick
  • Milky or creamy appearance, which can indicate coolant contamination

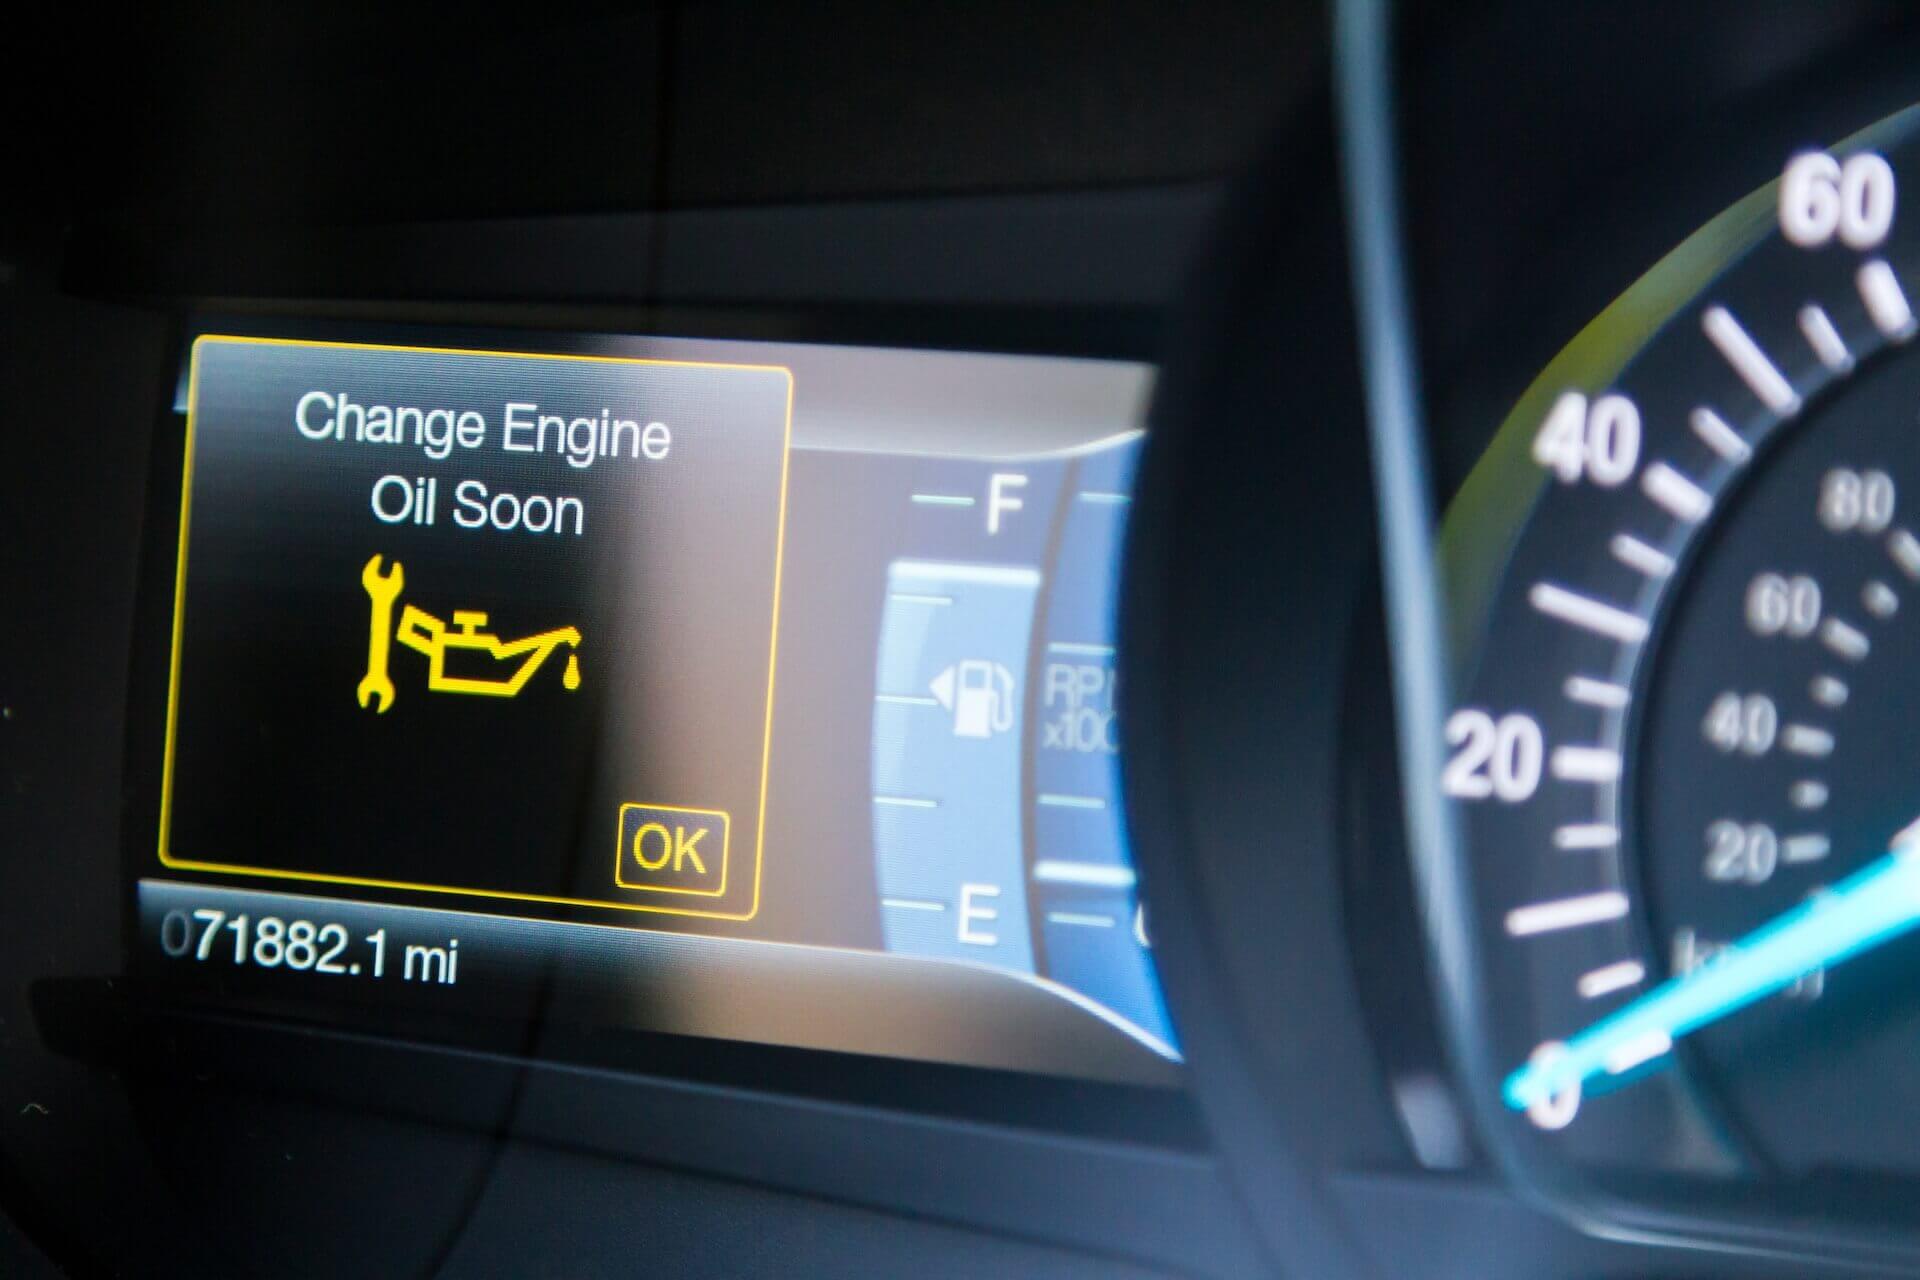
If the oil looks unusual, it may be worth having a professional inspection. You can also learn more about warning signs, like an oil light, in this guide on why your oil light might be on and what to do about it.

Oil Is Low. Now What?

If your oil level is below the safe range, adding oil is usually straightforward.

Follow these steps:

  • Add oil in small amounts
  • Wait 2–3 minutes
  • Recheck the dipstick
  • Repeat if needed

Important: Avoid overfilling the engine. Too much oil can cause pressure issues and damage internal components.

Quick reminder: Overfilling can create its own problems, so adding oil slowly is always better than pouring in too much at once.

How Often Should You Check Your Oil?

Many drivers rarely check their oil until something goes wrong, but regular checks can help prevent problems.

A simple rule of thumb:

  • Check oil once a month
  • Check before long road trips
  • Check more often if your vehicle has higher mileage

If you recently bought a used vehicle, checking weekly for the first month can help you understand what your car’s normal oil consumption looks like.

You can also learn more about the importance of regular maintenance in this guide on what happens if you don’t change your oil.

When It’s Time to Get Help

Sometimes low oil is just a maintenance issue, but other times it can signal a deeper problem.

You may want a professional to take a look if:

  • You have to add oil frequently
  • The oil level drops quickly
  • You notice oil leaks under the vehicle
  • The oil looks milky or smells burnt

If you want a quick second set of eyes, a technician can check your oil level and help determine what’s going on.

And if it’s simply time for fresh oil, Grease Pro oil changes are fast, reliable, and don’t require an appointment.

Keep Your Engine Protected

Checking your oil regularly is one of the easiest ways to extend your engine’s life and avoid costly repairs.

If you’d rather have a professional handle it, Grease Pro can check your oil and perform fast oil changes without an appointment.

Find a Grease Pro location near you

Why Is My Oil Light On? (And What to Do About It)

When an oil light comes on, the first thought is often about money and whether your car is about to leave you stranded. The dashboard tries to separate urgent warnings from simple reminders, but it’s not always clear. And let’s be honest, most people don’t have time to flip through the owner’s manual to figure it out.

The good news is, you don’t have to guess. With a little know-how, you can tell what your oil light is really saying and whether it needs immediate attention or just a service appointment in the near future.

Oil Light vs. Oil Change Light: What’s the Difference?

Drivers often confuse the oil pressure warning light with the oil change reminder light, but they serve two very different purposes.

Shaped like a small oil can, this light warns you that the engine oil pressure has dropped. Low oil pressure means your engine isn’t getting the lubrication it needs, which can quickly cause serious damage. If this red light comes on, it’s important to stop the vehicle safely and check your oil level right away. This light is more of a maintenance alert. It lets you know your vehicle is due for an oil change based on mileage or time. While not urgent, ignoring it for too long can lead to dirty or degraded oil that reduces performance and increases wear.

Remember: red means urgent, yellow means service soon. Knowing the difference can help you respond the right way and avoid bigger problems.

Common Reasons Your Oil Light Turns On

Your oil light can switch on for several reasons. Some are simple fixes, while others signal that your engine needs quick attention. Here are the most common ones:

  • Low oil level: If your engine doesn’t have enough oil, it can’t lubricate moving parts properly. This is the most common reason the oil light turns on, and it’s also one of the easiest to check.
  • Oil pressure problem: If your oil pump isn’t working correctly or if the oil filter is clogged, the pressure in your system drops. Low pressure means oil isn’t flowing where it needs to, and that can quickly damage your engine.
  • Faulty sensor: Sometimes the problem isn’t with the oil at all, but with the sensor that measures it. A failing sensor can trigger the light even when everything looks fine, which is why it’s smart to confirm your oil level before panicking.
  • Thin or dirty oil: Over time, oil breaks down and loses its ability to protect your engine. If it’s too old, too thin, or filled with debris, the system may recognize it as unsafe and trigger the warning.
  • Light flickers during braking or turns: If the light blinks when you hit the brakes or take a sharp turn, your oil may be low enough that it sloshes away from the sensor. It’s a clear sign you should top it off and check for leaks.

What to Do When the Oil Light Comes On

If your oil light turns on, don’t ignore it. Here are the steps to take, depending on what you see:

  • Pull over safely if the light is red: A red oil pressure light means your engine may not be getting the oil it needs. Keep driving, and you risk major damage. Find a safe spot to pull over and shut off the engine.
  • Check your oil level: Once parked, let the engine cool for a few minutes, then use the dipstick to check the oil level. This quick step tells you if you’re running low.
  • Top off if you have oil: If the dipstick shows the oil is low and you have the right kind of oil with you, add enough to bring it back to the recommended level. This can buy you enough time to get to a shop.
  • No oil on hand? Play it safe: If you don’t have oil with you, avoid running the engine. Call for roadside assistance or arrange for a tow to prevent costly engine damage. Driving even a short distance with no oil can do serious harm.
  • Watch for leaks: Look underneath the car for puddles or drips. Even a small leak can cause the oil light to come back on after topping off.
  • Avoid driving if the light keeps flashing or stays on: A flashing or persistent light means the problem isn’t solved by adding oil. It could be a pressure issue or a faulty sensor, and driving further could put your engine at serious risk.

Pro Tip: Keep a quart of the right motor oil in your trunk. It doesn’t take up much space, and it can save you from being stranded if your oil light comes on when you’re away from home.

Why Is My Oil Light Still On After an Oil Change?

Few things are more frustrating than paying for an oil change and then seeing the oil light pop right back on. If this happens, it doesn’t always mean something was done wrong. Here are the most common reasons it can stay lit after service:

  • Sensor wasn’t reset: Many vehicles need the oil change reminder system to be reset manually after service. If this step gets missed, the light will stay on even though the oil has been changed.
  • Wrong oil type or level: Using the incorrect oil viscosity or not filling to the proper level can trigger the light. Double-checking with the manufacturer’s specs is key here.
  • Persistent oil pressure issue: Sometimes the light isn’t related to the oil change itself but to a bigger problem, such as a weak oil pump or clogged filter. If topping off or changing oil doesn’t clear the light, it could point to a pressure problem.
  • Mistaken oil lights: The oil pressure warning light (red) is often confused with the oil change reminder (yellow/amber). The pressure light means something more serious, and changing the oil won’t fix it.

If your oil light won’t go away after a fresh oil change, don’t ignore it. A quick inspection can usually pinpoint whether it’s a simple reset or a more important issue that needs attention.

How to Reset an Oil Change Light

In many vehicles, the oil change reminder doesn’t turn off automatically once fresh oil is added. Instead, the system needs to be reset manually. The process isn’t the same for every make and model, but most cars follow a few common methods:

  • Ignition key method: Insert the key, switch to “on” without starting the engine, and press the gas pedal fully three times within 10 seconds.
  • Button reset method: Some vehicles use a button near the odometer or dashboard menu. Holding it for a few seconds while the ignition is on can clear the reminder.
  • Menu navigation: Newer cars often require scrolling through a digital display menu to find “reset oil life” or “maintenance reset.”

If these steps don’t match your car, check the owner’s manual for the exact procedure. And if you’d rather not hassle with it, a technician at Grease Pro can reset it quickly during your visit.

When to Visit a Shop

Some oil light situations can be handled with a quick top-off or reset, but there are times when professional help is the safest move:

  • Light flashing = urgent: A flashing oil light means oil pressure is dangerously low. Driving further could cause major engine damage. Stop driving and call for assistance.
  • Oil level fine, but the light persists: If the dipstick shows enough oil and the light still won’t go away, it may be a sensor issue or a deeper pressure problem that needs a mechanic’s inspection.
  • Light keeps returning after reset: If you’ve reset the reminder and it comes back quickly, it could mean the system is detecting something else, such as oil breakdown or pressure loss.

Bottom line: if the oil light doesn’t go away with a simple fix, don’t take chances. Having a shop check it out quickly can save you from costly repairs and keep your vehicle reliable.

Professional Oil Light Help Is Just a Visit Away

Oil lights don’t come on for no reason. Whether it’s a quick reset, a simple top-off, or a deeper issue with oil pressure, Grease Pro can help you get to the bottom of it. Our technicians check your system thoroughly so you’re not left guessing, and we’ll only recommend the work your vehicle truly needs.You can schedule a service online or stop by the Grease Pro location closest to you. We make it easy to get your car checked out quickly, so you can get back on the road with confidence.

Synthetic Blend vs Full Synthetic: What’s the Difference & Is Full Synthetic Worth It?

Once you’ve moved away from conventional oil, it feels like a smart step—synthetic just sounds better. But then you’re faced with another decision: should you stick with a synthetic blend, or go all in with full synthetic oil?

That’s the real question for many drivers. Is full synthetic truly better, or is a blend good enough for how and where you drive? In this guide, we’ll walk through the key differences in protection, price, and how long each oil lasts. You’ll see where full synthetic shines—and where a blend might do just fine—so you can make a confident, informed choice without any pressure.

What Is Synthetic Blend Oil?

Synthetic blend oil is a mix of conventional motor oil and synthetic base stock. It’s made to offer better performance than regular oil, like improved wear protection and cleaner engine operation, without the higher cost of full synthetic. For many drivers, it strikes a balance between protection and price.

  • More refined than regular oil, but not fully lab-made
  • Offers decent wear protection for most daily driving
  • Lower cost than full synthetic
  • Common in manufacturer specs for mid-range vehicles

Is synthetic blend oil good? For many everyday drivers, yes. It’s a solid step up from conventional oil, especially if you’re looking to extend engine life without jumping to a full synthetic oil change.

What Is Full Synthetic Oil?

Full synthetic oil is fully engineered in a lab for maximum purity, consistency, and performance. Unlike blends, it contains no conventional oil—just advanced base stocks and additives designed to hold up under stress. It performs exceptionally well in high heat, during cold starts, and over extended oil change intervals.

  • Designed for long-lasting engine protection
  • Flows better at extreme temperatures
  • Slows down engine wear and sludge buildup
  • Required in many newer or high-performance vehicles

Wondering does synthetic oil last longer? In most cases, yes. And when comparing options, it’s fair to ask: is full synthetic oil better than synthetic blend? For demanding conditions or newer engines, it often is.

Why More Drivers Are Choosing Full Synthetic (Even with the Cost)

Yes—Full Synthetic Lasts Longer.
Most full synthetic oils can go 7,500 to 10,000+ miles between changes. That’s nearly twice as long as a synthetic blend oil change interval.

While full synthetic oil can cost more up front, many drivers find the value adds up over time. Fewer oil changes, stronger protection, and better performance in tough conditions make it a smart choice. Especially if you drive long distances, tow, or plan to keep your vehicle for years. For many, the durability and reliability of full synthetic are well worth the extra cost.

Key Differences Between Synthetic Blend & Full Synthetic

Feature Synthetic Blend Full Synthetic
Composition Mix of synthetic & conventional 100% synthetic
Oil Change Interval ~5,000–7,000 miles ~7,500–10,000+ miles
Engine Protection Moderate Excellent
Cost $$ $$$
Best For Budget-conscious, older cars Newer, high-performance, extreme temps
Resistance to Breakdown Decent High

The biggest difference between full synthetic and synthetic blend comes down to how long they last, how well they protect your engine, and how they perform in extreme conditions. If you’re looking for fewer oil changes or stronger performance for towing, hot weather, or long commutes, full synthetic oil is often the better choice.

When Is Full Synthetic Worth It?

Not every driver needs full synthetic, but for many, it’s absolutely worth it. If you’re on the fence, here are a few situations where upgrading makes real-world sense:

  • Your owner’s manual requires it.
    Some engines, especially in newer vehicles, are built with tighter tolerances or turbochargers that need a more stable oil formula. Full synthetic meets those higher standards.
  • You drive long distances regularly.
    The longer your engine runs, the hotter it gets. Full synthetic oil resists breakdown over time and keeps performing on extended trips.
  • You tow or haul heavy loads.
    Towing puts extra strain on your engine. Full synthetic helps protect key components by maintaining proper lubrication under pressure.
  • You drive in extreme heat or cold.
    Synthetic oil flows more easily at cold start and holds up better in high heat—making it ideal for Florida summers and fluctuating temps.
  • You want fewer oil changes.
    Most full synthetic oils can go up to 10,000+ miles with proper maintenance, cutting down how often you need service.

What If I Use Synthetic Blend Instead?

If your car doesn’t specifically require full synthetic, using a synthetic blend oil won’t hurt anything. It’s still a step up from conventional oil and provides solid protection for most daily driving. But there are a few things to keep in mind:

  • You may need oil changes more often.
    Synthetic blends don’t last as long as full synthetic, so you’ll likely be back for service sooner.
  • Performance might dip in extreme conditions.
    In high heat, cold starts, or under heavy engine loads, blends can break down faster and provide less consistent protection.
  • If your car requires full synthetic, a blend could cause problems.
    Using a blend when your manual calls for full synthetic could affect efficiency, or even void your warranty.

If none of the full synthetic scenarios apply to you, a blend might be just fine. And at Grease Pro, we’ll help you choose the right option based on your car, not just what’s in stock.

Still Deciding? Let’s Talk at Your Next Oil Change

Not sure which oil is right for your car? We’ve got you. When you come in for your next synthetic blend oil change or full synthetic service, our team will walk you through your options. No pressure, no guesswork, no appointment needed. 

  • We follow manufacturer specs, not upsell scripts
  • We explain the differences so you can decide with confidence
  • And we only use high-quality oil that matches your engine

Find a Location Near You


Curious how synthetic oil compares to conventional (regular) oil?

We break that down here: Synthetic Vs. Regular

Get Your Car Road-Trip Ready for Summer

Why Prepping Your Car for a Summer Road Trip Is Essential

There’s nothing worse than car trouble in the middle of a long-awaited summer road trip. High temperatures, extended driving hours, and heavy loads can put extra strain on your vehicle, increasing the risk of breakdowns. Taking the time to go through a road trip checklist before hitting the road can help you avoid unexpected repairs, improve fuel efficiency, and ensure a smoother, stress-free journey. Whether it’s getting the car ready with routine maintenance or checking key components like tires, brakes, and fluids, a little preparation can go a long way in keeping your trip safe and enjoyable.

Tires Make or Break Your Road Trip—Here’s How to Check Them

Your tires are the only point of contact between your car and the road, making them one of the most important things to check before a long trip. Underinflated, unbalanced, or worn-out tires can lead to poor handling, reduced fuel efficiency, and even dangerous blowouts. Taking a few minutes to inspect them before you leave can help you avoid these problems and keep your trip running smoothly. A quick road trip checklist for your tires should include checking air pressure, tread depth, and ensuring they’re properly balanced and rotated.

Check Air Pressure and Tread Before You Go

Properly inflated tires improve gas mileage and reduce wear, helping you get the most out of every tank of fuel. Before hitting the road, use a tire pressure gauge to ensure each tire meets the recommended PSI listed in your owner’s manual. Additionally, check the tread depth to confirm your tires have enough grip for safe handling. If the tread is too low, it may be time for a replacement to ensure optimal traction, especially on long drives.

Don’t Forget Tire Balance and Rotation

Unbalanced tires can cause vibrations at high speeds and lead to uneven wear, reducing their lifespan. Getting your tire balance checked before a long trip ensures a smoother, safer ride. Tire rotation is just as important—it helps distribute wear evenly across all four tires, extending their durability and improving overall performance. If it’s been a while since your last tire service, consider scheduling one before your trip to keep your ride comfortable and efficient.

A Brake Check Could Save Your Trip—And Your Safety

Your brakes are your first line of defense on the road, and worn-out components can put you at risk—especially on long trips. High temperatures and stop-and-go traffic add extra stress to your braking system, making a brake check essential before hitting the road.

If you hear squeaking, grinding, or feel vibrations when braking, or notice a longer stopping distance, it’s time for an inspection. Checking your brake pads and fluid levels before your trip ensures smooth, reliable stopping power—keeping you and your passengers safe.

Fluids Keep Your Engine Running—Check These Before You Go

Your engine relies on fluids to stay cool, lubricated, and running efficiently—especially in hot summer temperatures. Low or dirty fluids can lead to overheating, poor performance, and costly breakdowns. Before your trip, checking oil levels, coolant, and other essential fluids ensures your car can handle the long drive ahead.

Engine Oil and Coolant—Your Car’s Lifeline

Oil keeps your engine’s moving parts lubricated, preventing friction and wear. Check the oil level and condition before heading out—if it’s low or dirty, an oil change may be needed. Coolant is just as important, as it regulates engine temperature. Without enough coolant, your engine could overheat, leaving you stranded on the side of the road.

Transmission and Brake Fluid—Small Checks, Big Impact

A transmission fluid check ensures smooth gear shifts and prevents overheating, which is especially important for long-distance driving. Brake fluid plays a crucial role in stopping power—if levels are too low, braking performance may suffer. Checking and topping off these fluids before your trip helps keep your car running safely and efficiently.

Don’t Let a Dead Battery Ruin Your Trip

A weak battery can turn your road trip plans into a roadside headache. Extreme summer heat can accelerate battery wear, making it more likely to fail when you least expect it. Before heading out, test your battery’s charge, inspect the terminals for corrosion, and ensure all connections are secure.

It’s also a good idea to check your headlights, brake lights, and A/C system to ensure they’re functioning properly. A failing battery can lead to dim lights or weak air conditioning, both of which can make long drives less safe and comfortable. A quick battery test and inspection can help prevent unexpected stalls and keep your trip on track.

Pack These Must-Haves for a Stress-Free Road Trip

Even with the best vehicle prep, unexpected situations can happen. A well-stocked road trip checklist ensures you’re ready for anything—from a dead battery to minor roadside repairs. Packing essentials like jumper cables, a tire inflator, and a first aid kit can make all the difference if an issue arises.

Don’t forget to bring plenty of water, a flashlight, and extra phone chargers in case of delays. Keeping roadside assistance info and an emergency contact list handy adds another layer of security. With the right supplies, you can handle minor hiccups and keep your focus on enjoying the trip.

One Last Step—Get a Professional Inspection Before You Go

A DIY check is a great start, but a professional inspection can catch issues you might miss. Small problems—like uneven tire wear, low fluids, or a weak battery—can quickly turn into major setbacks on a long trip. A pre-trip inspection ensures your car is road-ready, fuel-efficient, and safe for long-distance travel.

Make sure your summer adventure goes off without a hitch. No appointment needed – stop by today. Find the location nearest you. Our technicians will check all the essentials, so you can hit the road with confidence.

What Happens If You Put the Wrong Oil in Your Car?

Why Choosing the Right Engine Oil Matters

Engine oil is the lifeblood of your car’s engine, ensuring smooth operation by lubricating moving parts, reducing friction, and regulating temperature. Using the wrong oil, however, can disrupt this balance, leading to a range of problems—from minor performance issues to costly repairs. Recognizing the symptoms of putting the wrong oil in your car can help you address the problem early, protecting your vehicle from long-term damage. This guide explains what happens when you use the wrong engine oil and how to prevent it.

Why Does Engine Oil Matter?

Engine oil plays a crucial role in keeping your car’s engine running smoothly and efficiently. Its primary functions include:

  • Lubrication: Reducing friction between the engine’s moving parts to prevent wear and tear.
  • Cooling: Helping dissipate heat generated by the engine, preventing overheating.
  • Cleaning: Removing contaminants and debris from the engine to keep it performing at its best.

The viscosity of the oil—its thickness and ability to flow at different temperatures—is just as important. Using oil that doesn’t meet your car manufacturer’s specifications can compromise its performance. For example, thick oil for cars may not circulate effectively in modern engines, while thinner oils may fail to provide adequate protection in older models. This is why understanding your car’s recommended oil type is essential to avoid costly issues.

What Happens When You Put the Wrong Oil in Your Car?

Using the wrong oil in your car can lead to both short-term inconveniences and long-term damage. Here’s what can happen:

  • Poor Lubrication: When the oil doesn’t have the right viscosity or properties, it fails to properly coat the engine’s moving parts. This increases friction, causing wear and tear that can shorten the engine’s lifespan.
  • Increased Friction and Overheating: Incorrect oil can struggle to regulate engine temperatures, leading to overheating and potential damage to sensitive components.
  • Reduced Fuel Efficiency: The added friction and strain on the engine can cause it to work harder, consuming more fuel in the process.
  • Risk of Engine Damage or Failure: Over time, persistent use of the wrong oil can lead to significant damage, including clogged oil passages, degraded seals, or even complete engine failure.

Understanding what happens when you put the wrong oil in your car is essential for taking swift action to prevent these problems. Recognizing the signs early can save you from costly repairs and ensure your vehicle remains reliable.

Symptoms of Using the Wrong Engine Oil

It’s not always obvious when the wrong oil has been used in your car, but certain symptoms can signal trouble. Here are the most common signs to watch for:

  • Engine Knocking or Unusual Noises: If the oil is too thin or thick, it may not provide sufficient lubrication, causing metal parts to grind against each other and produce knocking or ticking sounds.
  • Overheating Issues: Incorrect oil may fail to regulate engine temperatures, leading to overheating during normal operation.
  • Poor Engine Performance or Sluggishness: A mismatch in oil viscosity can reduce efficiency, making your car feel sluggish or less responsive.
  • Visible Leaks or Unusual Oil Consumption: Using the wrong oil can degrade seals and gaskets, leading to leaks or higher-than-normal oil usage.

Recognizing the symptoms of wrong engine oil early can help prevent further damage. If you notice any of these issues, it’s important to act quickly by replacing the oil with the correct type and consulting a mechanic if necessary.

Can You Fix It If You Put the Wrong Oil in Your Car?

If the wrong oil has been used in your car, the issue can often be resolved if addressed quickly. The first step is to drain the incorrect oil and refill the engine with the recommended type to prevent further circulation of the wrong oil. It’s essential to consult your vehicle’s owner’s manual to confirm the manufacturer’s specifications, including the proper viscosity and type of oil for your engine. If symptoms persist or you’re unsure about the extent of the issue, visiting a professional mechanic for an inspection is a smart choice. Acting promptly can help avoid long-term damage and keep your engine running smoothly.

How to Avoid Putting the Wrong Oil in Your Car

Preventing issues caused by the wrong oil starts with a few simple but important habits. Always double-check the oil viscosity and specifications recommended for your vehicle, as listed in the owner’s manual. This ensures the oil you use matches your engine’s requirements. If you’re unsure, consulting a trusted mechanic can provide clarity and confidence in your choice. Additionally, opting for reputable service providers for oil changes can reduce the risk of errors and ensure your car is well cared for. Taking these precautions can save you time, money, and the hassle of addressing engine problems later.

When to Seek Professional Help

There are times when addressing engine oil issues on your own may not be enough, and professional assistance becomes essential. If you notice persistent wrong engine oil symptoms, such as unusual noises, overheating, or poor performance, it’s a clear sign that your car needs expert attention. Similarly, if your engine begins experiencing major performance issues after an oil change, it’s best to consult a professional to assess the situation and ensure no long-term damage has occurred. Finally, if you’re having trouble identifying the root cause of the problem, our team at Grease Pro can provide a thorough inspection and recommend the appropriate solutions to keep your car running smoothly. Seeking help promptly can prevent small problems from turning into costly repairs.

Protect Your Engine with the Right Oil

Using the correct oil is essential for keeping your engine running smoothly and avoiding costly repairs. Recognizing bad oil symptoms early and addressing issues quickly can make all the difference in maintaining your car’s performance and longevity. Regular maintenance is key, and ensuring your vehicle receives the right care should always be a priority. If you suspect an issue or it’s time for your next oil change, schedule your service with Grease Pro to keep your car in top condition.

5 Things to Know About Oil Changes for Your Car

Keeping your car’s engine running smoothly requires more than just filling up the gas tank. Regular oil changes are crucial to ensure the longevity and efficiency of your engine. Here are five essential things you should know about oil changes to keep your car in top shape.

1. Why Oil Changes Are Important

Motor oil is the lifeblood of your car’s engine. It lubricates the engine’s moving parts, reduces friction, and helps to prevent overheating. Over time, oil breaks down and becomes less effective at protecting your engine. Regular oil changes remove the old, degraded oil and replace it with fresh, clean oil, helping to extend the life of your engine and maintain performance.

2. How Often Should You Change Your Oil?

The age-old question: “How often should you change your oil?” The answer depends on several factors, including the type of oil you use and your driving habits. Traditional wisdom suggested changing oil every 3,000 miles, but with modern engines and advanced oil formulations, many vehicles now have recommended intervals of 5,000 to 7,500 miles. Always consult your car’s owner’s manual for the manufacturer’s recommendations.

3. Choosing the Right Oil for Your Car

Not all motor oils are created equal. Your car’s engine is designed to work with a specific type of oil, whether it’s conventional, synthetic, or a blend. Synthetic oil changes often come at a higher cost but provide better performance and protection, particularly in extreme temperatures. To determine what kind of oil your car needs, check your owner’s manual or consult with an oil change service professional.

4. The Cost of an Oil Change

The cost of an oil change can vary based on several factors, such as the type of oil used—whether conventional, synthetic, or a blend—and the specific needs of your vehicle, especially if it requires specialized oils for advanced or high-performance engines. Additional services, like filters or fluid top-offs, also impact the overall price. To maximize your savings, take advantage of loyalty programs like Grease Pro’s. Our members enjoy extra discounts and exclusive offers that significantly reduce the cost of routine maintenance, making it a smart choice for both budget-conscious and loyal customers.

5. Finding the Best Oil Change Services

When searching for oil change places near me, consider not only the cost but also the quality of service. Look for reputable auto shops with good reviews and certified technicians. Some places offer additional perks like free tire checks or fluid top-ups with every oil change. Additionally, many services provide oil change specials to help you save money while ensuring your car gets the care it needs.

Regular oil changes are a small investment in your vehicle’s health that can pay off significantly in terms of engine performance and longevity. By understanding these key points, you can make informed decisions about maintaining your car and ensure it continues to run smoothly for years to come.

Schedule a service online or simply stop by the location closest to you!

Road Trip Ready: The Top Things to Check on Your Car Before Hitting the Highway

Top 10 Car Checks for a Safe Holiday Road Trip

The holiday season is here, bringing many families together through road trips. At Grease Pro, we’re dedicated to making your journey safe and joyful. To ensure your vehicle is ready for holiday adventures, here’s our comprehensive road trip checklist tailored for the most wonderful time of the year.

1. Tire Inspection – Important for Road Trip Safety

Examine your tires as part of your road trip safety protocol. Ensure they have adequate tread depth, are properly inflated, and free from damage. This is vital for safe handling and fuel efficiency, especially on long trips.

2. Brake System – Key to Your Safety

Check your brakes thoroughly, a crucial step in any pre-drive checklist. Listen for unusual sounds and note the responsiveness. If there’s any doubt, have a professional assess them to ensure your safety on the road.

3. Engine and Oil Levels – Maintaining the Health of Your Car

Regular engine and oil checks are pivotal for your vehicle’s health. Check oil levels and quality to prevent overheating, a vital part of any vehicle safety checklist. This ensures a smooth and reliable engine performance throughout your journey.

4. Coolant and Radiator Check – Avoiding Overheating

Your coolant level is crucial in maintaining engine temperature, especially important during the holiday season’s varying climates. Also, inspect the radiator for leaks or damage as part of your car’s checklist to prevent any mid-trip hassles.

5. Battery Health – Reliable Power Supply

Ensure your car’s battery is in good condition, an essential aspect of how to know if your car can make a long trip. Check for signs of wear or corrosion, and if it’s been a while, consider getting it tested or replaced.

6. Lights and Signal Functionality – Communication is Key

Functional lights and signals are vital for visibility and communication, a core aspect of road trip safety. Check all your lights, including headlights, brake lights, and turn signals, to ensure they’re working correctly.

7. Windshield Wipers and Fluid – Clear Vision for Safety

Visibility is crucial, making windshield wipers and fluid an important part of your road trip checklist. Replace any worn wipers and top up your washer fluid to ensure clear vision, no matter the weather.

8. HVAC System Check – Comfort and Visibility

Ensure your car’s HVAC system is functioning properly. Check for proper airflow and temperature adjustment. If the system isn’t heating or cooling effectively, it could indicate a need for maintenance, an important aspect of how to prepare for a road trip.

9. Emergency Preparedness – Essential for Road Trip Readiness

An updated emergency kit should be a staple in your vehicle, especially during the holiday season. This includes first aid supplies, tools, and necessary documentation, ensuring you’re prepared for any scenario.

10. Steering and Suspension – Ensuring Smooth Handling

Check your vehicle’s steering and suspension systems. Make sure the steering feels responsive and there are no unusual noises when turning. The suspension should be firm yet comfortable, providing stability and comfort on various terrains.

Set Off with Confidence This Holiday Season

As you prepare for your holiday road trips, remember the joy of the journey starts with a well-prepared vehicle. By following these essential tips, you’re ensuring a safe, enjoyable, and memorable trip. For a comprehensive checkup and peace of mind, Grease Pro is your go-to destination.

Plan your holiday road trip with confidence! Schedule a visit to Grease Pro for a thorough inspection and tune-up. Let us help you make your holiday journeys safe, enjoyable, and unforgettable. Book your appointment today and hit the highway with assurance!

How Long Can You Go Without an Oil Change?

Regular oil changes are vital to maintaining the health and longevity of your vehicle’s engine. Oil helps lubricate the engine’s moving parts, reducing friction and preventing wear and tear over time. Our expert technicians at Grease Pro can provide you a fast and easy walk-in oil change, and our blog will answer some common questions about oil changes and share some tips for keeping your engine running smoothly.

How Often Should You Change Your Oil?

The frequency of oil changes depends on various factors, such as the type of vehicle, driving conditions, and oil type. Generally, most car manufacturers recommend changing your oil every 5,000-7,500 miles, or every six months to a year if you drive fewer miles. However, newer vehicles may have longer oil change intervals of up to 10,000-15,000 miles.

It’s crucial to follow your vehicle’s recommended oil change intervals and not try to determine how many miles you can go over an oil change, for the health of your car. Over time, oil can break down and become contaminated with dirt, debris, and other particles. This can reduce its effectiveness in lubricating the engine and protecting it from damage. If you go too long without changing your oil, the oil can become thick, sludgy, and gummy, which can clog up the engine and cause it to run less efficiently.

What Happens If You Go Too Long Without an Oil Change?

Not changing your oil regularly can lead to a variety of issues for your vehicle. Without proper lubrication, the metal parts in your engine can rub against each other, causing friction and heat buildup. This can lead to increased wear and tear on the engine components, including the pistons, crankshaft, and bearings. Eventually, this can lead to engine damage and failure.

Another issue that can arise from not changing your oil is decreased engine performance. As the oil becomes thicker and less effective, the engine may have to work harder to operate, leading to decreased fuel efficiency and reduced power output. Going too long without an oil change can lead to costly repairs and maintenance down the road. In extreme cases, engine damage from lack of oil can be irreversible and require an engine replacement. 

Tips for Maintaining Your Vehicle’s Oil

While regular oil changes are crucial, there are several other things you can do to maintain your vehicle’s oil between oil change intervals. Here are some tips from GP to help keep your vehicle running smoothly:

  • Check your oil level regularly: It’s essential to check your oil level at least once a month, especially if you’re driving frequently or taking long trips. This will help you catch any potential problems early on and prevent damage to your engine.
  • Use high-quality oil: Choosing the right type of oil can make a big difference in the performance and longevity of your engine. Look for high-quality oils that meet or exceed the manufacturer’s recommendations.
  • Keep your engine clean: Dirt and debris can accumulate in your engine over time, which can cause your oil to become contaminated. Regularly cleaning your engine can help prevent this from happening.
  • Replace your oil filter regularly: Your oil filter is responsible for removing impurities from your oil, which can help keep your engine running smoothly. Be sure to replace your oil filter at the recommended intervals.

Regular oil changes are a vital part of vehicle maintenance that should not be ignored. By sticking to your recommended oil change intervals and ensuring that your vehicle’s engine is properly lubricated, you can help prolong the life of your engine and save yourself from costly repairs down the road. So, the next time your vehicle is due for an oil change, make sure to take the time to get it done with the expert technicians at Grease Pro – your car (and wallet) will thank you! With 12 convenient locations around Panama City and Bay County, we’ll make your walk-in oil change experience worth your time. 

How Long Does an Oil Change Take?

When it comes to oil changes, most drivers want to know one thing: how long is this going to take? On average, an oil change lasts 15 to 45 minutes. The exact time depends on where you go, the type of vehicle you drive, and whether any extra checks or services are included.

This guide breaks down what happens during an oil change, why different shops take different amounts of time, and what you can do to help keep the process quick.


Key Takeaways

  • Most oil changes take 15–45 minutes, depending on your vehicle and the shop.
  • Dealerships often take longer (30–60 minutes or more) because of extra inspections, paperwork, or bundled services.
  • Quick-service shops are the fastest, usually 15–30 minutes in the bay, with walk-in convenience and dedicated bays.
  • DIY oil changes often take 30–90 minutes, plus the hassle of cleanup and disposal.
  • Keeping up with routine maintenance makes each oil change faster and smoother.

How Fast Can an Oil Change Be Done?

At a fast-service shop like Grease Pro, most oil changes are wrapped up in about 15 to 30 minutes in the bay. In the quickest scenarios, it might take as little as 10 minutes. The total time in and out of the shop may be a little longer depending on how busy the location is, whether you walk in during peak hours, and if you’re adding services like tire rotations or wiper replacements.

Quick-service shops are designed for speed: technicians are ready, tools are in place, and the process is streamlined so you can get back on the road without a long wait.

Why Do Oil Changes Take So Long?

An oil change may sound simple, but every step takes a few minutes to do properly. Here’s what goes into it:

  1. Draining the old oil (5–10 minutes): After removing the drain plug, the oil pan needs time to fully empty. Rushing this step can leave dirty oil behind.
  2. Replacing the oil filter (2–3 minutes): The old filter is unscrewed, and a new one is installed. It’s quick but essential for trapping contaminants.
  3. Adding fresh oil (2–4 minutes): The right type and amount of oil are poured in, based on manufacturer specs. Accuracy matters here.
  4. Running the engine & checking for leaks (3–5 minutes): The car is started to circulate the oil, and the technician makes sure nothing is leaking around the plug or filter.
  5. Complimentary multi-point inspection (2–5 minutes): At Grease Pro, we check fluids, filters, wipers, lights, and tires during the oil change. Most of this happens at the same time as other steps, like while the old oil is draining, so it adds very little to your total visit time while still giving you extra value and peace of mind.

Altogether, this adds up to about 15–30 minutes in the bay, and explains why a proper oil change is never just “five minutes.”

What Can Change the Timing of an Oil Change?

Most oil changes are straightforward, but several details can make your visit quicker or slower than expected. Here are the most common factors:

Shop Traffic and Workflow

  • Lunch hours and late afternoons are often the busiest, which can create extra wait time before your car even enters a bay.
  • Quick-service shops usually keep these delays short, while dealerships or smaller garages may involve longer waits due to fewer bays or stricter scheduling.

Vehicle Design

  • Some vehicles provide easy access to the filter and drain plug, while others require removing panels or working in tight spaces.
  • European makes, trucks with skid plates, or SUVs with large oil capacities often take longer to service.

Added Services

  • Many drivers combine an oil change with tire rotations, brake inspections, wiper replacements, or fluid flushes.
  • Each service adds only a few minutes, but together they can extend your total time in the bay.

These differences explain why some drivers are in and out quickly while others may need to wait a little longer, even when the core service is the same.

How Long an Oil Change Takes at Different Shops or DIY

Dealerships (30 to 60 minutes or more)

Oil changes at dealerships often take longer because they are wrapped into a bigger process:

  • Appointment-based scheduling means you may spend time waiting for your slot, even if the oil change itself is quick.
  • Extra manufacturer-specific inspections or diagnostics add time but help with warranty compliance.
  • Bundled services, such as tire rotations or software updates, extend the total service window.

Dealerships provide convenience for warranty and service records, but they are rarely the fastest option.

Quick-Service Shops (15 to 30 minutes)

Quick-service shops are built for efficiency:

  • Walk-in convenience with no appointments required.
  • Dedicated bays reserved just for oil changes reduce wait times.
  • Essential inspections only, such as fluid checks, filter checks, and tire pressure set, without layers of dealership paperwork or added upsells.

These shops are typically the fastest choice for drivers who want a thorough oil change with minimal waiting.

DIY Oil Changes (30 to 90 minutes)

Doing an oil change yourself can save money, but it often takes more time:

  • Draining oil, swapping filters, and refilling usually take longer without lifts and professional tools.
  • Mistakes such as overfilling, stuck filters, or overtightened bolts can cause delays.
  • Safe disposal of used oil and filters requires an additional trip to a recycling center.

DIY oil changes can be rewarding, but most drivers find professional service quicker and less of a hassle.

Want Faster Oil Changes? Keep Up with Routine Care

Oil changes usually go quickly, but delays happen when parts are worn or stuck. An overdue oil filter can harden in place, drain plugs can strip, and skid plate bolts might rust, all of which add time before the oil even starts draining. Dirty or sludgy oil can slow things down, too, since the technician may need to pause and check for underlying issues.

The good news? These setbacks are far less common when oil changes are done on schedule. Routine care keeps filters easy to remove, bolts moving freely, and the system clean, making every visit faster and more predictable.

Quick Oil Changes in Panama City, Lynn Haven, and Chipley

Nobody looks forward to waiting for a car service, but keeping up with regular oil changes is the best way to avoid surprises and keep your time in the shop to a minimum. And when you want the process handled quickly and correctly, Grease Pro offers walk-in oil changes that get you back on the road without the hassle.

Plus, when you stay on top of your car’s care, it pays off. Really! With GP Loyalty Rewards, you earn 3% GP Cash on every purchase, including oil changes, which you can use toward your next visit.